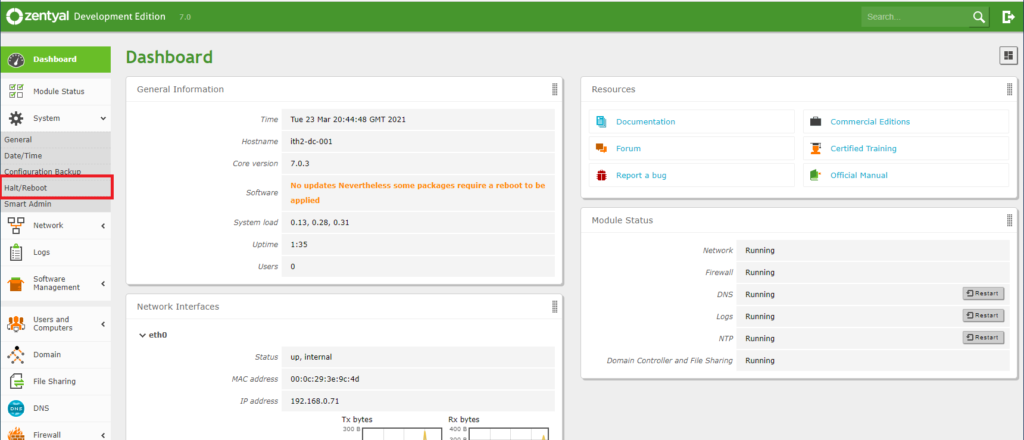
I had to install a wordpress server for a client today. I used the instructions from THIS site.
How To Install WordPress on Ubuntu 14.04
Apr 24, 2014 WordPress Ubuntu
Introduction
At this time, WordPress is the most popular CMS (content management system) on the internet. It allows you to easily set up flexible blogs and websites on top of a MySQL backend with PHP processing. WordPress has seen incredible adoption and is a great choice for getting a website up and running quickly.
In this guide, we’ll focus on getting a WordPress instance set up with an Apache web server on Ubuntu 14.04.
Prerequisites
Before you begin this guide, there are some important steps that you need to complete on your server.
We will be proceeding through these steps as a non-root user with sudo privileges, so you will need to have one available. You can find out how to create a user with sudo privileges by following steps 1-4 in our Ubuntu 14.04 initial server setup guide.
Additionally, you’ll need to have a LAMP (Linux, Apache, MySQL, and PHP) stack installed on your VPS instance. If you don’t have these components already installed and configured, you can use this guide to learn how to install LAMP on Ubuntu 14.04.
When you are finished with these steps, you can continue with this guide.
Step One — Create a MySQL Database and User for WordPress
The first step that we will take is a preparatory one. WordPress uses a relational database to manage and store site and user information.
We have MySQL installed, which can provide this functionality, but we need to make a database and a user for WordPress to work with.
To get started, log into the MySQL root (administrative) account by issuing this command:
mysql -u root -p
You will be prompted for the password you set for the MySQL root account when you installed the software. You will then be given a MySQL command prompt.
First, we can create a separate database that WordPress can control. You can call this whatever you would like, but I will be calling it wordpress because it is descriptive and simple. Enter this command to create the database:
CREATE DATABASE wordpress;
Every MySQL statement must end in a semi-colon (;), so check to make sure this is present if you are running into any issues.
Next, we are going to create a separate MySQL user account that we will use exclusively to operate on our new database. Creating one-function databases and accounts is a good idea from a management and security standpoint.
I am going to call the new account that I’m making wordpressuser and will assign it a password of password. You should definitely change the password for your installation and can name the user whatever you’d like. This is the command you need to create the user:
CREATE USER wordpressuser@localhost IDENTIFIED BY 'password';
At this point, you have a database and a user account, each made specifically for WordPress. However, these two components have no relationship yet. The user has no access to the database.
Let’s fix that by granting our user account access to our database with this command:
GRANT ALL PRIVILEGES ON wordpress.* TO wordpressuser@localhost;
Now the user has access to the database. We need to flush the privileges so that the current instance of MySQL knows about the recent privilege changes we’ve made:
FLUSH PRIVILEGES;
We’re all set now. We can exit out of the MySQL prompt by typing:
exit
You should now be back to your regular command prompt.
Step Two — Download WordPress
Next, we will download the actual WordPress files from the project’s website.
Luckily, the WordPress team always links the most recent stable version of their software to the same URL, so we can get the most up-to-date version of WordPress by typing this:
cd ~
wget http://wordpress.org/latest.tar.gz
This will download a compressed file that contains the archived directory contents of the WordPress files to our home directory.
We can extract the files to rebuild the WordPress directory we need by typing:
tar xzvf latest.tar.gz
This will create a directory called wordpress in your home directory.
While we are downloading things, we should also get a few more packages that we need. We can get these directly from Ubuntu’s default repositories after we update our local package index:
sudo apt-get update
sudo apt-get install php5-gd libssh2-php
This will allow you to work with images and will also allow you to install plugins and update portions of your site using your SSH login credentials.
Step Three — Configure WordPress
Most of the configuration that we will be doing will be through a web interface later on. However, we do need to do some work from the command line before we can get this up and running.
Begin by moving into the WordPress directory that you just unpacked:
cd ~/wordpress
A sample configuration file that mostly matches the configuration we need is included by default. However, we need to copy it to the default configuration file location to get WordPress to recognize the file. Do that now by typing:
cp wp-config-sample.php wp-config.php
Now that we have a configuration file to work with, let’s open it in a text editor:
nano wp-config.php
As I said before, this file is almost entirely suitable for our needs already. The only modifications we need to make are to the parameters that hold our database information.
We will need to find the settings for DB_NAME, DB_USER, and DB_PASSWORD in order for WordPress to correctly connect and authenticate to the database we created.
Fill in the values of these parameters with the information for the database you created. It should look like this:
// ** MySQL settings - You can get this info from your web host ** //
/** The name of the database for WordPress */
define('DB_NAME', 'wordpress');

/** MySQL database username */
define('DB_USER', 'wordpressuser');

/** MySQL database password */
define('DB_PASSWORD', 'password');
These are the only values that you need to change.
When you are finished, save and close the file.
Step Four — Copy Files to the Document Root
Now that we have our application configured, we need to copy it into Apache’s document root, where it can be served to visitors of our website.
One of the easiest and most reliable way of transferring files from directory to directory is with the rsync command. This preserves permissions and has good data integrity features.
The location of the document root in the Ubuntu 14.04 LAMP guide is /var/www/html/. We can transfer our WordPress files there by typing:
sudo rsync -avP ~/wordpress/ /var/www/html/
This will safely copy all of the contents from the directory you unpacked to the document root.
We should now move into the document root to make some final permissions changes
cd /var/www/html
You will need to change the ownership of our files for increased security.
We want to give user ownership to the regular, non-root user (with sudo privileges) that you plan on using to interact with your site. This can be your regular user if you wish, but some may suggest that you create an additional user for this process. It is up to you which you choose.
For this guide, we will use the same account that we set up during the initial server setup guide, which we called demo. This is the account I am performing all of the actions of this guide as.
The group ownership we will give to our web server process, which is www-data. This will allow Apache to interact with the content as necessary.
We can quickly assign these ownership values by typing:
sudo chown -R demo:www-data *
This will set up the ownership properties that we are looking for.
While we are dealing with ownership and permissions, we should also look into assigning correct ownership on our uploads directory. This will allow us to upload images and other content to our site. Currently, the permissions are too restrictive.
First, let’s manually create the uploads directory beneath the wp-content directory at our document root. This will be the parent directory of our content:
mkdir /var/www/html/wp-content/uploads
We have a directory now to house uploaded files, however the permissions are still too restrictive. We need to allow the web server itself to write to this directory. We can do this by assigning group ownership of this directory to our web server, like this:
sudo chown -R :www-data /var/www/html/wp-content/uploads
This will allow the web server to create files and directories under this directory, which will permit us to upload content to the server.
Step Five — Complete Installation through the Web Interface
Now that you have your files in place and your software is configured, you can complete the installation through the web interface.
In your web browser, navigate to your server’s domain name or public IP address:
http://server_domain_name_or_IP
You will see the WordPress initial configuration page, where you will create an initial administrator account:
![Wordpress initial config]()
Fill out the information for the site and the administrative account you wish to make. When you are finished, click on the install button at the bottom.
WordPress will confirm the installation, and then ask you to log in with the account you just created:
![WordPress confirm install]()
Hit the button at the bottom and then fill out your account information:
![WordPress login]()
You will be presented with the WordPress interface:
![WordPress admin interface]()
Step Six (Optional) — Configure Pretty Permalinks for WordPress
By default, WordPress creates URLs dynamically that look something like this:
http://server_domain_name_or_IP/?p=1
This isn’t exactly the most useful interface for visitors or search engines, so most users want to modify this. WordPress has the ability to create “pretty” permalinks which will clean up the URL into a more human-friendly format.
There are a few things we need to do to get this to work with Apache on Ubuntu 14.04.
Modifying Apache to Allow URL Rewrites
First, we need to modify the Apache virtual host file for WordPress to allow for .htaccess overrides. You can do this by editing the virtual host file.
By default, this is 000-default.conf, but your file might be different if you created another configuration file:
sudo nano /etc/apache2/sites-available/000-default.conf
Inside of this file, we want to set up a few things. We should set the ServerName and create a directory section where we allow overrides. This should look something like this:
<VirtualHost *:80>
    ServerAdmin webmaster@localhost
    DocumentRoot /var/www/html
    ServerName server_domain_name_or_IP
    <Directory /var/www/html/>
        AllowOverride All
    </Directory>
    . . .
When you are finished, save and close the file.
Next, we need to enable the rewrite module, which allows you to modify URLs. You can do this by typing:
sudo a2enmod rewrite
After you have made these changes, restart Apache:
sudo service apache2 restart
Create an .htaccess File
Now that Apache is configured to allow rewrites through .htaccess files, we need to create an actual file.
You need to place this file in your document root. Type this to create an empty file:
touch /var/www/html/.htaccess
This will be created with your username and user group. We need the web server to be the group owner though, so we should adjust the ownership by typing:
sudo chown :www-data /var/www/html/.htaccess
We now have the correct ownership of this file.
We may need to adjust the permissions however. This depends on how you prefer to work. WordPress will generate the necessary rewrite rules for you. If it has write permissions to this file, it can implement the rules automatically. If it does not, you will have to manually edit this file to add the correct rules.
Which configuration you choose depends on how much you value convenience over security. Allowing the web server write access to this file will definitely be more convenient, but some say that it is an unnecessary security risk.
If you want WordPress to automatically update this file with rewrite rules, you can ensure that it has the correct permissions to do so by typing:
chmod 664 /var/www/html/.htaccess
If you want to update this file manually for the sake of a small security gain, you can allow the web server only read privileges by typing:
chmod 644 /var/www/html/.htaccess
Change the Permalink Settings in WordPress
When you are finished doing the server-side changes, you can easily adjust the permalink settings through the WordPress administration interface.
On the left-hand side, under the Settings menu, you can select Permalinks:
![WordPress permalinks]()
You can choose any of the preconfigured settings to organize URLs, or you can create your own.
![WordPress perma options]()
When you have made your selection, click “Save Changes” to generate the rewrite rules.
If you allowed the web server write access to your .htaccess file, you should see a message like this:
![WordPress perma update]()
If you did not allow the web server write access to your .htaccess file, you will be provided with the rewrite rules you need to add to the file manually.
Copy the lines that WordPress gives you and then edit file on your server:
nano /var/www/html/.htaccess
This should give you the same functionality.
Conclusion
You should now have a WordPress instance up and running on your Ubuntu 14.04 VPS. There are many avenues you can take from here. Below we’ve listed some options: