Zentyal 6.2: Connect to Zentyal Server 6.2 using the browser.

Connect to Zentyal 6.2 Web Gui:

You can connect to the Zentyal Dashboard remotely using a browser which means that you do not have to be physically in front of the server too manage it.

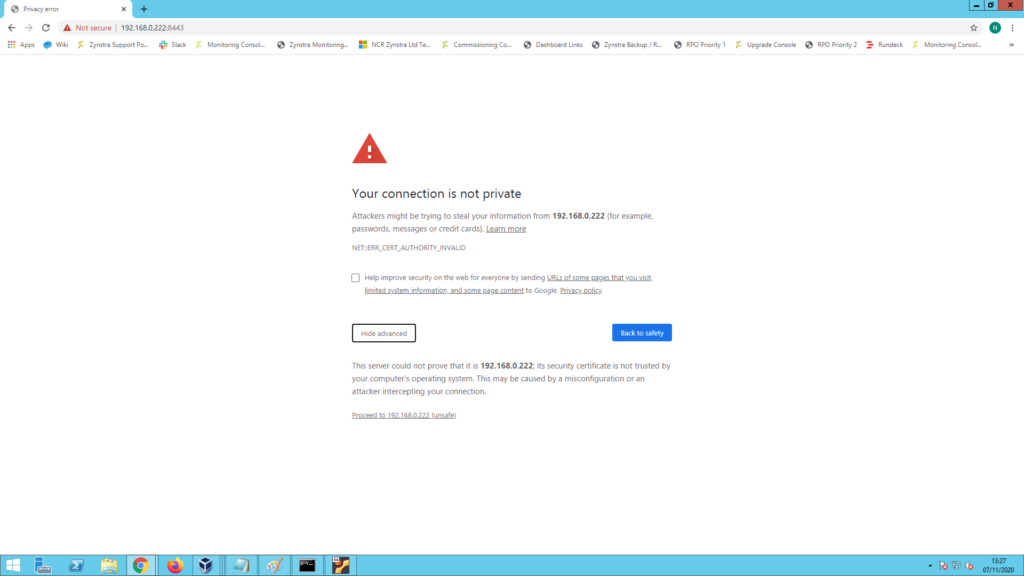
To connect go to “https://ip_address:8443”, where ip_address is the IP address or the hostname on which Zentyal is installed.

Zentyal 6.2: Connect to Zentyal Server 6.2 using the browser.

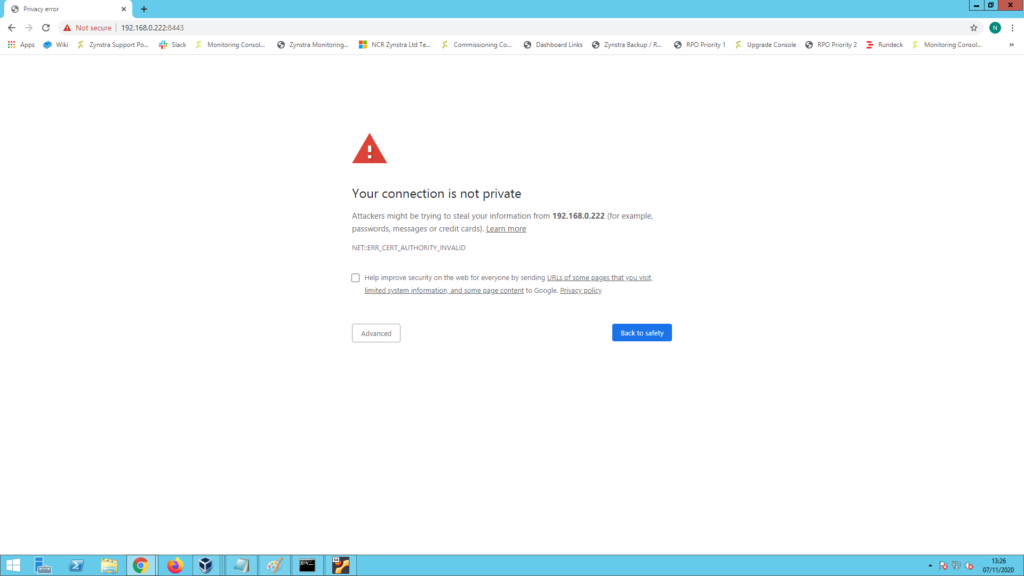
Select advanced:

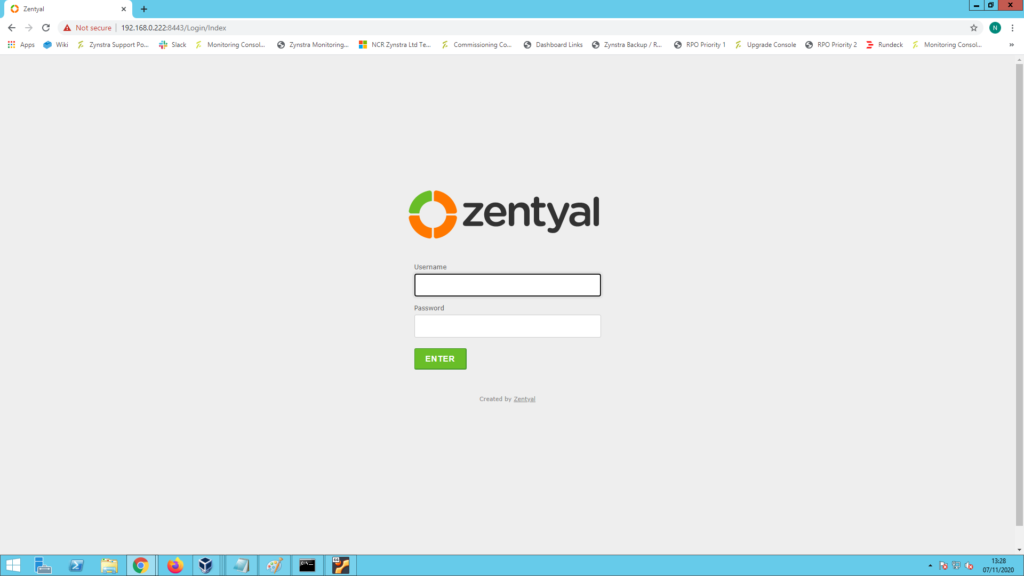
Click on Proceed to server_ip (unsafe). This willl take you to the login page:

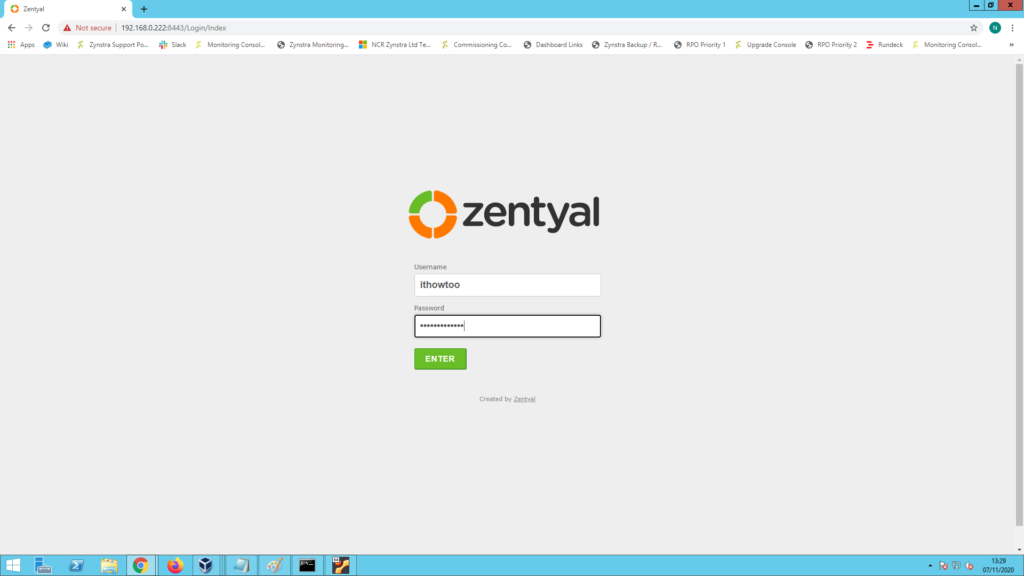
Log in using the user and password created during server startup and click Enter to log in.

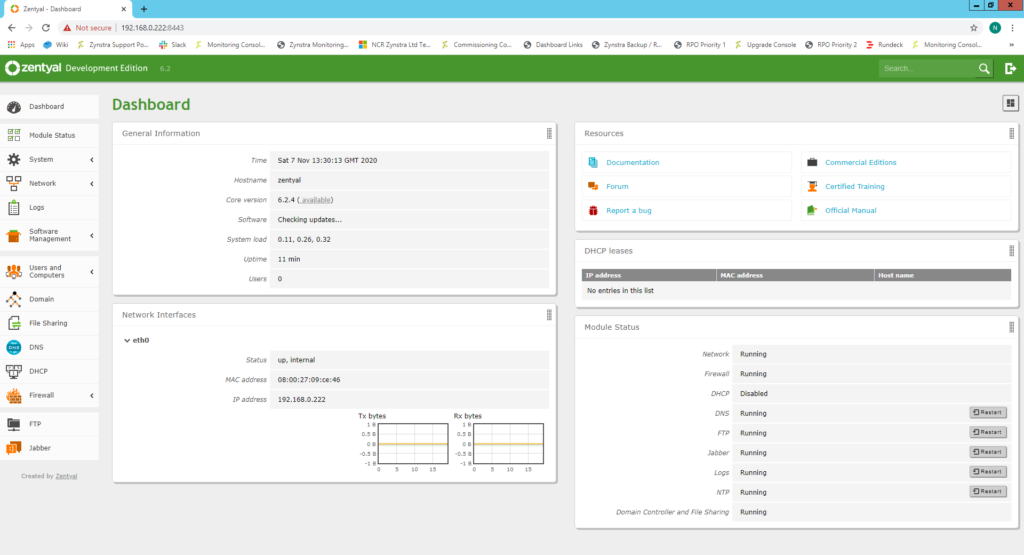
You will now see the Dashboard and can start setting up your server.

For more posts on Zentyal go to our Zentyal Category.

Zentyal 6.2: Configuring newly installed Zentyal 6.2 Server.

Log into the web interface in the VirtualBox VM that was created using the article HERE:

Zentyal 6.2: Configuring newly installed Zentyal 6.2 Server.

Use the user and password that were created when installing the server:

Configure Zentyal 6.2 Server:

You will now be on the initial Setup Page:

Click on the Continue button:

Choose the Zentyal packages to install and then click the Install button at the bottom of the page:

Click Continue to install the packages:

Wait while the packages install:

When the packages are installed click next to configure networking:

Select the method of setting the IP address for this example I have chosen static as I do not want my ip address provided by DHCP. Once the settings have been filled in click on Next:

Choose the installation type and the domain name. As I have no previous domain to add the server to I chose the Standalone server to create a new domain. Click Finish.

Click OK to start the configuration of the server:

Wait for the setup to finish:

The installation of the server is now finished. Click GO TO THE DASHBOARD to close the Installation Wizard:

You will now see the Zentyal Dashboard. You can use the dashboard through the console or connect to “https://ip_address:8443 (where server_ip is the ip address set during setup), from a browser which is my preferred method as there is no need to physically connect to the server to do configuration:

Console:

Browser:

You are now ready to configure your server.

Windows Server AD: Using Group Policy Preferences to Map Drives Based on Group Membership

Had to create a GPO today to map drives on users desktops, I used THIS site.

Public drive mappings typically do not require membership to a particular group. However, sometimes public drive mappings do not provide enough granularity. Most organizations have data specific to business units such as accounting, marketing, or human resources.. Inclusive Group Drive mappings solve this problem by allowing a configuration that maps a specific drive letter to a specific network share based on the user being a member of a particular group. This ensures members of the accounting unit receive drive letters mapped for accounting and members of human resources map their respective drives. Exclusive drive mappings are not very common; however, they do provide the flexibility to prevent a user from mapping a particular drive letter to a network share if they are not a member of a specific group. A good example of exclusive drive mappings is to prevent the CIO or other executives members from mapping a drive letter in which they are likely to never use. Let us take a closer look at these scenarios

Public drive mappings

Producing a Group Policy Preference item to create public drive mappings is simple. The GPO containing the preference item is typically linked to higher containers in Active Directory, such as a the domain or a parent organizational unit.

Configuring the drive map preference item.

image
Figure 1 Configuring mapped drive preference item
Newly created Group Policy objects apply to all authenticated users. The drive map preference items contained in the GPO inherits the scope of the GPO; leaving us to simply configure the preference item and link the GPO. We start by configuring the drive map preference item by choosing the Action of the item. Drive map actions include CreateReplaceUpdate, andDelete. These are the actions commonly found in most preference items. Create and Delete actions are self-explanatory. The compelling difference between Replace and Update is that Replace deletes the mapped drive and then creates a new mapped drive with the configured settings. Update does NOT delete the mapped drive– it only modifies the mapped drive with the new settings. Group Policy Drive Maps use the drive letter to determine if a specific drive exists. The preceding image shows a Drive Map preference item configure with the Replace action. The configured location is a network share named data; hosted by a computer named hq-con-srv-01. The configured drive letter is the G drive. All other options are left at their defaults. This GPO is linked at the contoso.com domain.
The results of this configuration are seen when using Windows Explorer on the client computer. The following picture shows a user’s view of Windows Explorer. We see there is one network location listed here, which is the G drive that is mapped to \hq-con-srv-01data.
image
Figure 2 Public drive map client view
Later, we’ll see how to use exclusive drive mappings with public drive mappings as a way to exclude public drive mappings from a subset of users.

Inclusive drive mapping

Inclusive drive mappings are drives mapped to a user who is a member of (or included) in a specific security group. The most common use for inclusive drive maps is to map remote data shares in common with a specific sub set of users, such as accounting, marketing , or human resources. Configuring an inclusively mapped drive is the same as a public drive mappings, but includes one additional step. The following image shows us configuring the first part of an inclusive drive mapping preference item.
image
Figure 3 Inclusive drive mapping
Configuring the first part of an inclusive drive mapping preference item does not make it inclusive; it does the work of mapping the drive. We must take advantage of item-level targeting to ensure the drive mapping items works only for users who are members of the group. We can configure item level targeting by clicking the Targeting button, which is located on the Common tab of the drive mapping item. The targeting editor provides over 20 different types of targeting items. We’re specifically using the Security Group targeting item.
image
Figure 4 Security group targeting item
Using the Browse button allows us to pick a specific group in which to target the drive mapping preference item. Security Group targeting items accomplishes its targeting by comparing security identifiers of the specified group against the list of security identifiers with the security principal’s (user or computer) token. Therefore, always use the Browse button when selecting a group; typing the group name does not resolve the name to a security identifier.
image
Figure 5 Configured inclusive security group targeting item
The preceding screen shows a properly configured, inclusive targeting item. A properly configured security group targeting item shows both Group and SID fields. The Group field is strictly for administrative use (we humans recognize names better than numbers). The SID field is used by the client side extension to determine group membership. We can determine this is an inclusive targeting item because of the text that represents the item within the list. The word is in the text “the user is a member of the security group CONTOSOManagement.” Our new drive map item and the associated inclusive targeting item are now configured. We can now link the hosting Group Policy object to the domain with confidence that only members of the Management security group receive the drive mapping. We can see the result on a client. The following image shows manager Mike Nash’s desktop from a Windows Vista computer. We can see that Mike receives two drive mappings: the public drive mapping (G: drive) and the management drive mapping (M: drive).
image
Figure 6 Client view of inclusive drive mapping

Exclusive drive mapping

The last scenario discussed is exclusive drive mapping. Exclusive drive mappings produce the opposite results of an inclusive drive mapping; that is, the drive map does NOT occur if the user is a member of the specified group. This becomes usefully when you need to make exceptions to prevent specific drives from mapping. Let’s add an exclusive drive mapping to our public drive mapping to prevent specific members of management from receiving the public drive mapping.
image
Figure 7 Configured exclusive drive mapping
The preceding image shows the changes we made to the public drive mapping (from the first scenario). We’ve added a Security Group targeting item to the existing public drive mapping preference item. However, the targeting item applies only if the user IS NOT a member of the ExcludePublicDrives group. We change this option using the Items Options list. The client view of manager Monica Brink shows the results of applying Group Policy.
image
Figure 8 Client view of exclusive drive mapping
This client applies two Group Policy objects; each containing a drive mapping preference item. One item contains our public drive mapping with an exclusive security group targeting item. The other GPO contains the management drive mapping with an inclusive security group targeting item. The client processes the public drive mapping GPO; however, the exclusive targeting item verifies that Monica is a member of the ExcludePublicDrives group. Monica is also a member of theManagement group. Therefore, Monica’s group memberships prevent her from receiving the public drive mapping and include her in receiving the management drive mapping.

Summary

Drive mapping preference items do not require any scripting knowledge and are easy to use. Leveraging targeting items with drive mapping items increases the power in which to manage drive mapping to users and computers. Public drive mappings are typically linked at higher levels in the domain and generally apply to a large subset (if not all) users. Inclusive drive mappings associate as specific subset of data with a specific group of people, often times mapping to logical divisions within an organization such as accounting, marketing, or human resources. Exclusive drive mappings invert the principals of inclusive drive mappings. The user must not be a member of the specified group for the drive mapping to occur.

Best practices

Be sure to link GPOs high enough in Active Directory so the scope of the drive mapping effects the largest group of user accounts. Obviously, not every GPO should be linked at the domain; however, if there is an accounting organizational unit with three child OUs– then linking at the Accounting OU effects that largest amount of users. Allow your inclusive and exclusive targeting item to do the bulk of your work. GPOs hosting inclusive drive mappings are best used when the number of user needing the drive mapping are fewer than the number who do not. Exclusive drive mappings are best used when the number of user not requiring the drive mapping are fewer than the number that do. These rules help prevent users from becoming members of too many groups and increasing the cost of managing drive mappings within the organization.
OwnCload User Authentication with LDAP

I used the documentation below from the OwnCload site to configure the AD authentication.

User Authentication with LDAP

ownCloud ships with an LDAP application so that your existing LDAP users may have access to your ownCloud server without creating separate ownCloud user accounts.
Note
For performance reasons, we recommend using PHP 5.4 or greater to use the LDAP application with more than 500 users. The PHP LDAP module is required; this is supplied by php5-ldap on Debian/Ubuntu, and php-ldap on CentOS/Red Hat/Fedora.
The LDAP application supports:
  • LDAP group support
  • File sharing with ownCloud users and groups
  • Access via WebDAV and ownCloud Desktop Client
  • Versioning, external Storage and all other ownCloud features
  • Seamless connectivity to Active Directory, with no extra configuration required
  • Support for primary groups in Active Directory
  • Auto-detection of LDAP attributes such as base DN, email, and the LDAP server port number
Note
The LDAP app is not compatible with the WebDAV user backend app. You cannot use both of them at the same time.

Configuration

First enable the LDAP user and group backend app on the Apps page in ownCloud. Then go to your Admin page to configure it.
The LDAP configuration panel has four tabs. A correctly completed first tab (“Server”) is mandatory to access the other tabs. A green indicator lights when the configuration is correct. Hover your cursor over the fields to see some pop-up tooltips.

Server Tab

Start with the Server tab. You may configure multiple servers if you have them. At a minimum you must supply the LDAP server’s hostname. If your server requires authentication, enter your credentials on this tab. ownCloud will then attempt to auto-detect the server’s port and base DN. The base DN and port are mandatory, so if ownCloud cannot detect them you must enter them manually.
../_images/ldap-wizard-1-server.png
Server configuration:
Configure one or more LDAP servers. Click the Delete Configuration button to remove the active configuration.
Host:
The host name or IP address of the LDAP server. It can also be a ldaps:// URI. If you enter the port number, it speeds up server detection.
Examples:
  • directory.my-company.com
  • ldaps://directory.my-company.com
  • directory.my-company.com:9876
Port:
The port on which to connect to the LDAP server. The field is disabled in the beginning of a new configuration. If the LDAP server is running on a standard port, the port will be detected automatically. If you are using a non-standard port, ownCloud will attempt to detect it. If this fails you must enter the port number manually.
Example:
  • 389
User DN:
The name as DN of a user who has permissions to do searches in the LDAP directory. Leave it empty for anonymous access. We recommend that you have a special LDAP system user for this.
Example:
  • uid=owncloudsystemuser,cn=sysusers,dc=my-company,dc=com
Password:
The password for the user given above. Empty for anonymous access.
Base DN:
The base DN of LDAP, from where all users and groups can be reached. You may enter multiple base DNs, one per line. (Base DNs for users and groups can be set in the Advanced tab.) This field is mandatory. ownCloud attempts to determine the Base DN according to the provided User DN or the provided Host, and you must enter it manually if ownCloud does not detect it.
Example:
  • dc=my-company,dc=com

User Filter

Use this to control which LDAP users have access to your ownCloud server. You may bypass the form fields and enter a raw LDAP filter if you prefer.
../_images/ldap-wizard-2-user.png
only those object classes:
ownCloud will determine the object classes that are typically available for user objects in your LDAP. ownCloud will automatically select the object class that returns the highest amount of users. You may select multiple object classes.
only from those groups:
If your LDAP server supports the member-of-overlay in LDAP filters, you can define that only users from one or more certain groups are allowed to appear and log in into ownCloud. By default, no value will be selected. You may select multiple groups.
If your LDAP server does not support the member-of-overlay in LDAP filters, the input field is disabled. Please contact your LDAP administrator.
Edit raw filter instead:
Clicking on this text toggles the filter mode and you can enter the raw LDAP filter directly.
Example:
  • objectClass=inetOrgPerson
x users found:
This is an indicator that tells you approximately how many users will be allowed to access ownCloud. The number updates automatically after any changes.

Login Filter

The settings in the Login Filter tab determine what the user’s login will be, for example an LDAP username, or an email address. You may select multiple user details. (You may bypass the form fields and enter a raw LDAP filter if you prefer.)
You may override your User Filter settings on the User Filter tab by using a raw LDAP filter.
../_images/ldap-wizard-3-login.png
LDAP Username:
If this value is checked, the login value will be compared to the username in the LDAP directory. The corresponding attribute, usually uid or samaccountname will be detected automatically by ownCloud.
LDAP Email Address:
If this value is checked, the login value will be compared to an email address in the LDAP directory; specifically, themailPrimaryAddress and mail attributes.
Other Attributes:
This multi-select box allows you to select other attributes for the comparison. The list is generated automatically from the user object attributes in your LDAP server.
Edit raw filter instead:
Clicking on this text toggles the filter mode and you can enter the raw LDAP filter directly.
The %uid placeholder is replaced with the login name entered by the user upon login.
Examples:
  • only username: uid=%uid
  • username or email address: (|(uid=%uid)(mail=$uid))

Group Filter

By default, no LDAP groups will be available in ownCloud. The settings in the group filter tab determine which groups will be available in ownCloud. You may also elect to enter a raw LDAP filter instead.
../_images/ldap-wizard-4-group.png
only those object classes:
ownCloud will determine the object classes that are typically available for group objects in your LDAP server. ownCloud will only list object classes that return at least one group object. You can select multiple object classes. A typical object class is “group”, or “posixGroup”.
only from those groups:
ownCloud will generate a list of available groups found in your LDAP server. and then you select the group or groups that get access to your ownCloud server.
Edit raw filter instead:
Clicking on this text toggles the filter mode and you can enter the raw LDAP filter directly.
Example:
  • objectClass=group
  • objectClass=posixGroup
y groups found:
This tells you approximately how many groups will be available in ownCloud. The number updates automatically after any change.

Advanced Settings

The LDAP Advanced Setting section contains options that are not needed for a working connection. This provides controls to disable the current configuration, configure replica hosts, and various performance-enhancing options.
The Advanced Settings are structured into three parts:
  • Connection Settings
  • Directory Settings
  • Special Attributes

Connection Settings

../_images/ldap-advanced-1-connection.png

LDAP Advanced Settings, section Connection Settings
Configuration Active:
Enables or Disables the current configuration. By default, it is turned off. When ownCloud makes a successful test connection it is automatically turned on.
Backup (Replica) Host:
If you have a backup LDAP server, enter the connection settings here. ownCloud will then automatically connect to the backup when the main server cannot be reached. The backup server must be a replica of the main server so that the object UUIDs match.
Example:
  • directory2.my-company.com
Backup (Replica) Port:
The connection port of the backup LDAP server. If no port is given, but only a host, then the main port (as specified above) will be used.
Example:
  • 389
Disable Main Server:
You can manually override the main server and make ownCloud only connect to the backup server. This is useful for planned downtimes.
Case insensitive LDAP server (Windows):
When the LDAP server is running on a Windows Host.
Turn off SSL certificate validation:
Turns off SSL certificate checking. Use it for testing only!
Cache Time-To-Live:
A cache is introduced to avoid unnecessary LDAP traffic, for example caching usernames so they don’t have to be looked up for every page, and speeding up loading of the Users page. Saving the configuration empties the cache. The time is given in seconds.
Note that almost every PHP request requires a new connection to the LDAP server. If you require fresh PHP requests we recommend defining a minimum lifetime of 15s or so, rather than completely eliminating the cache.
Examples:
  • ten minutes: 600
  • one hour: 3600
See the Caching section below for detailed information on how the cache operates.

Directory Settings

../_images/ldap-advanced-2-directory.png

LDAP Advanced Settings, section Directory Settings
User Display Name Field:
The attribute that should be used as display name in ownCloud.
  • Example: displayName
Base User Tree:
The base DN of LDAP, from where all users can be reached. This must be a complete DN, regardless of what you have entered for your Base DN in the Basic setting. You can specify multiple base trees, one on each line.
  • Example:
    cn=programmers,dc=my-company,dc=com
    cn=designers,dc=my-company,dc=com
User Search Attributes:
These attributes are used when searches for users are performed, for example in the in the share dialogue. The user display name attribute is the default. You may list multiple attributes, one per line.
If an attribute is not available on a user object, the user will not be listed, and will be unable to login. This also affects the display name attribute. If you override the default you must specify the display name attribute here.
  • Example:
    displayName
    mail
Group Display Name Field:
The attribute that should be used as ownCloud group name. ownCloud allows a limited set of characters (a-zA-Z0-9.-_@). Once a group name is assigned it cannot be changed.
  • Example: cn
Base Group Tree:
The base DN of LDAP, from where all groups can be reached. This must be a complete DN, regardless of what you have entered for your Base DN in the Basic setting. You can specify multiple base trees, one in each line.
  • Example:
    cn=barcelona,dc=my-company,dc=com
    cn=madrid,dc=my-company,dc=com
Group Search Attributes:
These attributes are used when a search for groups is done, for example in the share dialogue. By default the group display name attribute as specified above is being used. Multiple attributes can be given, one in each line.
If you override the default, the group display name attribute will not be taken into account, unless you specify it as well.
  • Example:
    cn
    description
Group Member association:
The attribute that is used to indicate group memberships, i.e. the attribute used by LDAP groups to refer to their users.
ownCloud detects the value automatically. You should only change it if you have a very valid reason and know what you are doing.
  • Example: uniquemember

Special Attributes

../_images/ldap-advanced-3-attributes.png

LDAP Advanced Settings, section Special Attributes
Quota Field:
ownCloud can read an LDAP attribute and set the user quota according to its value. Specify the attribute here, and it will return human-readable values, e.g. “2 GB”.
  • Example: ownCloudQuota
Quota Default:
Override ownCloud default quota for LDAP users who do not have a quota set in the Quota Field.
  • Example: 15 GB
Email Field:
Set the user’s email from their LDAP attribute. Leave it empty for default behavior.
  • Example: mail
User Home Folder Naming Rule:
By default, the ownCloud server creates the user directory in your ownCloud data directory. You may want to override this setting and name it after an attribute value. The attribute given can also return an absolute path, e.g./mnt/storage43/alice. Leave it empty for default behavior.
  • Example: cn

Expert Settings

../_images/ldap-expert.png
In the Expert Settings fundamental behavior can be adjusted to your needs. The configuration should be well-tested before starting production use.
Internal Username:
The internal username is the identifier in ownCloud for LDAP users. By default it will be created from the UUID attribute. The UUID attribute ensures that the username is unique, and that characters do not need to be converted. Only these characters are allowed: [a-zA-Z0-9_.@-]. Other characters are replaced with their ASCII equivalents, or are simply omitted.
The LDAP backend ensures that there are no duplicate internal usernames in ownCloud, i.e. that it is checking all other activated user backends (including local ownCloud users). On collisions a random number (between 1000 and 9999) will be attached to the retrieved value. For example, if “alice” exists, the next username may be “alice_1337”.
The internal username is the default name for the user home folder in ownCloud. It is also a part of remote URLs, for instance for all *DAV services.
You can override all of this with the Internal Username setting. Leave it empty for default behaviour. Changes will affect only newly mapped LDAP users.
  • Example: uid
Override UUID detection
By default, ownCloud auto-detects the UUID attribute. The UUID attribute is used to uniquely identify LDAP users and groups. The internal username will be created based on the UUID, if not specified otherwise.
You can override the setting and pass an attribute of your choice. You must make sure that the attribute of your choice can be fetched for both users and groups and it is unique. Leave it empty for default behaviour. Changes will have effect only on newly mapped LDAP users and groups. It also will have effect when a user’s or group’s DN changes and an old UUID was cached, which will result in a new user. Because of this, the setting should be applied before putting ownCloud in production use and clearing the bindings (see the User and Group Mapping section below).
  • Example: cn
Username-LDAP User Mapping
ownCloud uses usernames as keys to store and assign data. In order to precisely identify and recognize users, each LDAP user will have a internal username in ownCloud. This requires a mapping from ownCloud username to LDAP user. The created username is mapped to the UUID of the LDAP user. Additionally the DN is cached as well to reduce LDAP interaction, but it is not used for identification. If the DN changes, the change will be detected by ownCloud by checking the UUID value.
The same is valid for groups.
The internal ownCloud name is used all over in ownCloud. Clearing the Mappings will have leftovers everywhere. Never clear the mappings in a production environment, but only in a testing or experimental server.
Clearing the Mappings is not configuration sensitive, it affects all LDAP configurations!

Testing the configuration

The Test Configuration button checks the values as currently given in the input fields. You do not need to save before testing. By clicking on the button, ownCloud will try to bind to the ownCloud server using the settings currently given in the input fields. The response will look like this:
../_images/ldap-settings-invalid-oc45.png

Failure
In case the configuration fails, you can see details in ownCloud’s log, which is in the data directory and calledowncloud.log or on the bottom the Settings – Admin page. You must refresh the Admin page to see the new log entries.
../_images/ldap-settings-valid-oc45.png

Success
In this case, Save the settings. You can check if the users and groups are fetched correctly on the Users page.

ownCloud Avatar integration

ownCloud support user profile pictures, which are also called avatars. If a user has a photo stored in the jpegPhoto orthumbnailPhoto attribute on your LDAP server, it will be used as their avatar. In this case the user cannot alter their avatar (on their Personal page) as it must be changed in LDAP. jpegPhoto is preferred over thumbnailPhoto.
../_images/ldap-fetched-avatar.png

Profile picture fetched from LDAP
If the jpegPhoto or thumbnailPhoto attribute is not set or empty, then users can upload and manage their avatars on their ownCloud Personal pages. Avatars managed in ownCloud are not stored in LDAP.
The jpegPhoto or thumbnailPhoto attribute is fetched once a day to make sure the current photo from LDAP is used in ownCloud. LDAP avatars override ownCloud avatars, and when an LDAP avatar is deleted it the most recent ownCloud avatar replaces it.
Photos served from LDAP are automatically cropped and resized in ownCloud. This affects only the presentation, and the original image is not changed.

Troubleshooting, Tips and Tricks

SSL Certificate Verification (LDAPS, TLS)

A common mistake with SSL certificates is that they may not be known to PHP. If you have trouble with certificate validation make sure that
  • You have the certificate of the server installed on the ownCloud server
  • The certificate is announced in the system’s LDAP configuration file (usually /etc/ldap/ldap.conf on Linux,C:openldapsysconfldap.conf or C:ldap.conf on Windows) using a TLS_CACERT /path/to/cert line.
  • Using LDAPS, also make sure that the port is correctly configured (by default 636)

Microsoft Active Directory

Compared to earlier ownCloud versions, no further tweaks need to be done to make ownCloud work with Active Directory. ownCloud will automatically find the correct configuration in the set-up process.

Duplicating Server Configurations

In case you have a working configuration and want to create a similar one or “snapshot” configurations before modifying them you can do the following:
  1. Go to the Server tab
  2. On Server Configuration choose Add Server Configuration
  3. Answer the question Take over settings from recent server configuration? with yes.
  4. (optional) Switch to Advanced tab and uncheck Configuration Active in the Connection Settings, so the new configuration is not used on Save
  5. Click on Save
Now you can modify and enable the configuration.

ownCloud LDAP Internals

Some parts of how the LDAP backend works are described here.

User and Group Mapping

In ownCloud the user or group name is used to have all relevant information in the database assigned. To work reliably a permanent internal user name and group name is created and mapped to the LDAP DN and UUID. If the DN changes in LDAP it will be detected, and there will be no conflicts.
Those mappings are done in the database table ldap_user_mapping and ldap_group_mapping. The user name is also used for the user’s folder (except something else is specified in User Home Folder Naming Rule), which contains files and meta data.
As of ownCloud 5 internal user name and a visible display name are separated. This is not the case for group names, yet, i.e. a group name cannot be altered.
That means that your LDAP configuration should be good and ready before putting it into production. The mapping tables are filled early, but as long as you are testing, you can empty the tables any time. Do not do this in production.

Caching

The ownCloud Cache helps to speed up user interactions and sharing. It is populated on demand, and remains populated until the Cache Time-To-Live for each unique request expires. User logins are not cached, so if you need to improve login times set up a slave LDAP server to share the load.
Another significant performance enhancement is to install the Alternative PHP Cache (APC). APC is an OPcache, which is several times faster than a file cache. APC improves PHP performance by storing precompiled script bytecode in shared memory, which reduces the overhead of loading and parsing scripts on each request. (Seehttp://php.net/manual/en/book.apc.php for more information.)
You can adjust the Cache Time-To-Live value to balance performance and freshness of LDAP data. All LDAP requests will be cached for 10 minutes by default, and you can alter this with the Cache Time-To-Live setting. The cache answers each request that is identical to a previous request, within the time-to-live of the original request, rather than hitting the LDAP server.
The Cache Time-To-Live is related to each single request. After a cache entry expires there is no automatic trigger for re-populating the information, as the cache is populated only by new requests, for example by opening the User administration page, or searching in a sharing dialog.
There is one trigger which is automatically triggered by a certain background job which keeps the user-group-mappings up-to-date, and always in cache.
Under normal circumstances, all users are never loaded at the same time. Typically the loading of users happens while page results are generated, in steps of 30 until the limit is reached or no results are left. For this to work on an oC-Server and LDAP-Server, Paged Results must be supported, which presumes PHP >= 5.4.
ownCloud remembers which user belongs to which LDAP-configuration. That means each request will always be directed to the right server unless a user is defunct, for example due to a server migration or unreachable server. In this case the other servers will also receive the request.

Handling with Backup Server

When ownCloud is not able to contact the main LDAP server, ownCloud assumes it is offline and will not try to connect again for the time specified in Cache Time-To-Live. If you have a backup server configured ownCloud will connect to instead. When you have a scheduled downtime, check Disable Main Server to avoid unnecessary connection attempts.